
Survival
Survivalist Chick Guide: Hobbies That Make You Apocalypse-Ready
From knitting to foraging, these aren’t just hobbies, they’re hands-on survival skills that build confidence, capability, and independence when it counts.


Prepping isn’t just about gear and go-bags. It’s about becoming the kind of woman who can think on her feet, fix what’s broken, and turn basic tools into real solutions. One of the smartest ways to get ready for any emergency is to spend your free time picking up skills that double as hobbies. They’re fun now, but they could be life-saving later.
Whether you’re stuck in a blackout, off-grid, or bartering for essentials, the woman who can spin, mend, preserve, and build is the one who thrives. Plus, learning these skills now gives you a big advantage before you need them. They reduce your reliance on store shelves, teach creative problem-solving, and give you a serious confidence boost in the face of uncertainty.
We have 15 hobbies that are perfect for prepper-minded women. Each one includes why it matters, how to get started, and what to expect. Pick one to begin, master it, then move on to the next. The more you know, the less you’ll need to rely on luck or others in a crisis.
Let’s turn “weekend hobby” into long-term survival power.
1. Gardening for Food and Medicine
Why It’s Useful: Growing your own food means security and sustainability. Add in medicinal herbs, and you’ve got a living pharmacy outside your door.
How to Learn: Start small with raised beds, containers, or grow bags. YouTube, library books, and local extension offices are great resources. Track your success in a journal and adjust with the seasons.
Survivalist Chick Tip: Focus on high-calorie crops like potatoes and beans, and grow herbs like echinacea, chamomile, and lemon balm for natural remedies.
2. Canning and Food Preservation
Why It’s Useful: Extend your harvest and create a shelf-stable pantry. You’ll waste less and eat better during any disruption.
How to Learn: Begin with water bath canning for high-acid foods like jams and tomatoes. Graduate to pressure canning for meats and veggies. The Ball Blue Book is a classic starter guide.
Survivalist Chick Tip: Stock up on jars and lids before you need them, they’re always the first to vanish in a crisis.
3. Foraging
Why It’s Useful: Free food is everywhere, if you know what to look for. Foraging connects you with your environment and fills in the gaps when supplies are low.
How to Learn: Take local plant ID classes or go on guided walks. Start with easy-to-identify plants like dandelion, plantain, and chickweed.
Survivalist Chick Tip: Learn a few edible plants for every season and keep a laminated guide in your bug-out bag.
4. Knitting, Sewing, and Mending
Why It’s Useful: Clothes wear out. Knowing how to repair, patch, or make your own gives you independence and barter power.
How to Learn: Try online tutorials, join a sewing circle, or start with beginner kits. Learn both hand and machine sewing if you can.
Survivalist Chick Tip: Pick up extra needles, thread, and fabric when they’re cheap, they’ll be gold later.
5. Fire Starting and Bushcraft
Why It’s Useful: Building a fire can mean heat, safety, cooking, and morale. Knowing how to do it without a lighter puts you ahead.
How to Learn: Practice in safe outdoor settings with flint, ferro rods, and natural tinder. Learn to build different fire structures for different needs.
Survivalist Chick Tip: Teach your kids too, it’s a confidence builder and crucial survival skill for everyone.
6. Soap and Candle Making
Why It’s Useful: Cleanliness and light are more than luxuries when the grid goes down. Homemade soap and candles also make great barter goods.
How to Learn: Start with melt-and-pour kits, then move to cold process for soap and beeswax for candles. YouTube has step-by-step tutorials.
Survivalist Chick Tip: Infuse your soaps with herbal oils like lavender or calendula for added healing properties.
7. Fermenting and Sourdough Baking
Why It’s Useful: Fermenting boosts nutrition and shelf life. Sourdough means bread without needing store-bought yeast.
How to Learn: Start with kraut or pickles, and build a sourdough starter with just flour and water. Fermentation Facebook groups and cookbooks are great help.
Survivalist Chick Tip: Keep a backup dehydrated starter in your pantry for emergencies.
8. Basic Carpentry
Why It’s Useful: Knowing how to build or repair basic structures can save your shelter, fix furniture, and create tools.
How to Learn: Try DIY home projects or local classes. Focus on learning how to use hand tools, not just power tools.
Survivalist Chick Tip: Practice with scrap wood to build things like raised beds, crates, or small shelters.
9. Fishing and Small Game Hunting
Why It’s Useful: Protein is hard to come by when supplies run low. Being able to fish or trap small game gives you a survival edge.
How to Learn: Get your fishing license and practice at local ponds. Join a hunter’s safety course or start with survival trapping guides.
Survivalist Chick Tip: Keep a compact fishing kit in your bug-out bag or glove box, you never know when you’ll need it.
10. Herbalism
Why It’s Useful: Medicine may not always be available, but plants are. Learn to treat common issues naturally and safely.
How to Learn: Study herbal books like Medicinal Plants of the Pacific West or take courses from reputable herbalists. Practice making salves, tinctures, and teas.
Survivalist Chick Tip: Grow your own apothecary garden and dry herbs for winter use.
11. Beekeeping
Why It’s Useful: Bees don’t just make honey, they pollinate your entire garden. In a survival situation, honey becomes a powerhouse food, a natural antibiotic, and a valuable barter item. Beeswax can be used for candles, salves, waterproofing, and more.
How to Learn: Start with beginner beekeeping books or take a local class if offered. You’ll need to invest in some gear, including a hive, smoker, and protective clothing. Join your local beekeepers’ association to meet mentors and troubleshoot issues.
Survivalist Chick Tip: Choose calm, beginner-friendly breeds like Italian bees, and keep a small journal to track hive behavior and honey production.
12. Fitness and Self-Defense Training
Why It’s Useful: You can’t carry your kids, your bug-out bag, and your own body weight if you’re not strong enough. Stamina, strength, and confidence in your ability to defend yourself are critical, especially if you’re on your own.
How to Learn: You don’t need a gym. Bodyweight exercises, resistance bands, and hiking with a pack all build functional strength. Add in a martial art or basic self-defense class focused on real-world situations.
Survivalist Chick Tip: Build your stamina by doing your preps physically. Garden by hand, haul your own water, and carry your bug-out bag on practice runs.
13. Animal Husbandry
Why It’s Useful: Raising chickens, rabbits, goats, or even ducks gives you access to renewable protein, fertilizer, and tradeable goods like eggs and fiber. It also builds independence from the grocery store.
How to Learn: Start small. Chickens are often the gateway, and backyard flocks are legal in many urban areas. Online forums, YouTube channels like Homesteading Family, and agricultural extensions are great resources.
Survivalist Chick Tip: Learn to slaughter and butcher humanely, it’s a hard skill, but one that builds immense self-reliance.
14. Wildcrafting and Natural Dyeing
Why It’s Useful: Nature offers more than food and medicine, it also offers color, fiber, and beauty. Wildcrafting is the art of responsibly harvesting natural materials for crafts, clothing, and barter. Natural dyes can refresh old fabrics or give identity to handmade goods.
How to Learn: Start by identifying common dye plants like onion skins, goldenrod, or black walnut. Try small dye pots and natural fabrics like cotton or wool. Combine this with foraging and gardening for bonus skills.
Survivalist Chick Tip: Dyes can be used for signaling, camouflage, or morale-boosting crafts, don’t underestimate the emotional survival value of color.
15. Amateur Radio (HAM Radio)
Why It’s Useful: When the grid fails and cell towers are down, HAM radio is how you’ll find out what’s going on beyond your backyard. It’s also how you’ll reach help, or organize your community.
How to Learn: Study for the Technician license using free online guides and practice tests, then take the exam through your local amateur radio club. It’s easier than you think, and many clubs welcome beginners.
Survivalist Chick Tip: A hand-crank or solar-powered radio with shortwave capability is a great backup, but knowing how to use a HAM rig makes you the comms hub in any crisis.
Final Thoughts from Survivalist Chick
Hobbies aren’t just for passing time, they’re how you build the woman you need to be when the world stops spinning the way it used to. Every new skill you learn is another tool in your survival toolbox. And here’s the truth: you don’t have to master them all. Just start.
Choose one, get messy, learn as you go, and enjoy the process. You’ll gain more than just preparedness, you’ll rediscover your own power, one homemade candle, patch of garden, or jar of preserved food at a time.
Because when everything else falls away, you’re still you. Capable. Grounded. Ready.
You’ve got this.
—Survivalist Chick

Food Storage
How to Cook Without Power: 10 No-Electricity Meal Hacks That Actually Work
When the grid’s down and your stove’s dead, you still need to eat. Here’s how to cook without power like a survival-savvy woman.

When the lights go out, most people panic. They open the fridge a dozen times, fiddle with the microwave like it might magically work, and stare at their cold stove like it betrayed them. But not you. You’re a Survivalist Chick, and you know hunger doesn’t care if the grid is down. If anything, that’s when your cooking skills matter most.
Whether you’re facing a storm outage, rolling blackouts, or a full-on collapse, you need to be able to feed yourself and your family without flipping a single switch. That means thinking ahead, having the right tools, and knowing a few tricks that don’t rely on electricity or modern comforts. The good news? You don’t need a gourmet kitchen to whip up hot, filling, and even tasty meals when everything else fails.
Below are 10 real-deal meal hacks for when the power’s out, the grid’s gone, or you’re just living like the badass you are. Some of these require a little gear, some just a solid plan, but every single one will keep you fed, fueled, and ready to face whatever comes next.
1. Use a Butane or Propane Camping Stove
One of the easiest ways to cook without power is with a compact camping stove. Butane and propane stoves are affordable, easy to store, and don’t require any complicated setup.
These are great for boiling water, making soups, reheating canned goods, and frying basic meals like eggs or rice. Keep extra fuel canisters on hand, and always cook in a well-ventilated outdoor area.
Survivalist Chick Tip: Practice using your stove before you need it. Nothing’s worse than reading instructions by candlelight when you’re starving.
2. Harness the Power of a Rocket Stove
Rocket stoves use minimal wood but produce high heat, perfect for outdoor cooking. They’re compact, efficient, and work even in wind and light rain.
You can cook anything you’d cook on a regular stovetop, from rice and beans to frying up canned Spam or heating soup. Great for backyards, balconies, or bug-out locations.
These type of stoves are super popular with backpackers, so you may be able to pick up a used one, especially at the end of the camping season.
Survivalist Chick Tip: You can buy one, or build a DIY rocket stove from bricks, cans, or cinder blocks. It’s a fun weekend project that could save your life later.
3. Break Out the Solar Oven
Got sunshine? Use it. A solar oven lets you bake and slow-cook meals with just sunlight. They’re perfect for baking biscuits, roasting vegetables, or cooking stews, slow and steady wins the survival race.
They take longer than traditional cooking but require zero fuel and work silently, which is a bonus in stealth situations.
Survivalist Chick Tip: Start cooking early in the day and plan meals that don’t require precise timing. Bonus: it doesn’t heat up your space like an open flame.
4. Grill Like a Survival Queen
Charcoal or propane grills are great backup options when the power goes out. If you’ve got outdoor space, you’ve got a kitchen.
You can grill meat, toast bread, heat canned goods, or even cook scrambled eggs on a cast iron skillet. Just make sure your fuel supply is stocked.
Survivalist Chick Tip: Never grill indoors. Carbon monoxide kills faster than hunger. Keep it outside, always.
5. Get Comfortable With Cold-Prep Meals
Not everything needs heat. Cold-prep meals can be lifesavers, especially when time, fuel, or safety are limited.
Think: tuna salad, peanut butter wraps, overnight oats with powdered milk, or rehydrated couscous with oil and spices. If you’ve stocked canned beans, veggies, or meat, you’ve got a meal.
Survivalist Chick Tip: Keep a handwritten list of your go-to no-cook recipes. In the dark and stress, your brain might not remember them.
6. Cook With Sterno or Alcohol Stoves
These small flame sources are perfect for warming small meals or boiling water. They’re quiet, lightweight, and easy to use indoors with proper ventilation.
Use them with mess kits, mini pans, or camp cookware. Just don’t expect to cook a roast, this is about simplicity and survival.
Survivalist Chick Tip: Sterno cans are easy to stock and store for years. One can lasts around 2 hours, track your use so you know how much to store.
7. Fire Pit Cooking (Because Why Not Be a Pioneer Woman?)
If you’ve got a fire pit, you’ve got options. Wrap foil meals in layers and cook in the coals, or use a grate to fry, boil, or simmer.
Think: foil packet meals with rice and canned chili, roasted potatoes, even toasted bread or bannock over open flame.
If you go camping a lot, definitely try this style of cooking when campfires are permitted. Not quite ready for showtime? Cook sides in this manner instead. And don’t forget something as simple as hotdogs on a stick.
Survivalist Chick Tip: Keep long tongs, gloves, and cast iron tools on hand. Hot coals don’t care if your nails are painted.
8. Canned Heat + Small Pan = Hot Meals Anywhere
Use canned heat (like chafing dish fuel) to warm soup, make oatmeal, or cook a small skillet meal. It’s low-flame, easy to use, and designed for indoor environments like buffets.
Pair it with a stable surface and a metal pan or mess kit for maximum flexibility.
Survivalist Chick Tip: These fuels last hours and are safer than candles. Keep a stash tucked away in your blackout kit.
9. Instant Meals + Hot Water
Even if you can’t full-on cook, boiling water gives you power over a wide range of meals. Think instant mashed potatoes, ramen, soup packets, and freeze-dried meals.
You just need a Jetboil, camp kettle, or heat-safe pot and something to boil water with (see: rocket stove, Sterno, etc.). If you have a wood stove with a spot to place a pot on top, even better.
Survivalist Chick Tip: Store seasoning packets and instant mix-ins in ziplocks. Plain ramen gets old fast, flavor is a morale booster in hard times.
10. Keep a Manual Cooking Kit Ready to Go
None of these methods matter if you don’t have the right gear. That means hand tools, mess kits, utensils, manual can openers, cutting boards, and heat-safe cookware all pre-packed.
Create a “no power kitchen” bin with your emergency cooking essentials and store it near your fuel sources. Think of it as your blackout kitchen-in-a-box.
Survivalist Chick Tip: Test your setup during a planned “grid-down day.” You’ll learn fast what works, what’s missing, and what needs upgrading.
Final Thoughts From Survivalist Chick
You don’t have to fear the dark if you’ve got a plan. Cooking without power isn’t about gourmet meals, it’s about staying calm, fed, and fueled when everything else is falling apart. With a little preparation and the right gear, you’ll be flipping flapjacks by flashlight while your neighbors are crying over cold cereal.
Prep now, cook later, and when that next outage hits, you’ll be the one dishing out dinner like a queen in combat boots.
You’ve got this.
—Survivalist Chick
Safety
How to Prepare for Power Outages: A Guide to Staying Safe When the Lights Go Out
As the grid gets older and the heat keeps rising, power outages are becoming a real risk. Here’s how to prep smart.

Why Power Outages Are a Growing Threat
The power grid wasn’t built for this. Aging infrastructure, rising summer temperatures, and overloaded systems are creating the perfect storm for blackouts across the country. Add in wildfires, winter storms, cyberattacks, or even supply chain issues, and suddenly, electricity isn’t the guarantee we once thought it was.
For preppers, a power outage isn’t just a temporary inconvenience. It’s a stress test. No power means no refrigeration, no lighting, no internet, no running water in some cases, and no way to charge the devices we rely on. Whether you live in the city or the country, preparing for power loss is no longer optional, it’s survival 101.
Step 1: Stockpile Emergency Lighting
You’ll never regret having too much light when the grid fails. Relying on candles alone is a fire risk, especially with kids or pets. While your supplies should always include candles, you want to focus on other emergency lighting options.
You also want a variety of charging options – battery, rechargeable (via USB or rechargeable batteries) and solar. This way you have powered lighting in a variety of situations.
What to stash:
- Battery-powered LED lanterns
- Headlamps (keep hands free while you work)
- Flashlights in every room
- Solar garden lights (can be brought inside at night)
- Glow sticks for quick visibility
Survivalist Chick Tip: Keep a fully stocked drawer labeled “POWER OUTAGE KIT” with lighting, fresh batteries, and charging cords for easy grab-and-go use.
Step 2: Prep an Off-Grid Cooking Setup
Without electricity, your stove, microwave, and even electric kettles go silent. Prepping meals becomes more about fuel and flexibility. Don’t forget that you need a non-electric can opener, if your kitchen can opener is electric, and have it easily accessible (having your only non-electric in a bin of your prepping supplies in the garage would make it difficult to grab or even just find in the dark).
Your off-grid options:
- Propane camp stove (never use indoors)
- Butane burner (most are only for outdoors)
- Charcoal or propane grill (again, outdoors only)
- Rocket stove for wood-fired cooking
- Solar oven for sunny climates
Survivalist Chick Tip: Practice cooking basic meals on your backup setup, or take it with you while camping to test it out. You don’t want the first time you use it to be during a storm.
Step 3: Keep Food Safe (and Cold)
When the fridge dies, the countdown to food spoilage begins. A little planning goes a long way.
What to do:
- Freeze water bottles to keep your freezer full and cold
- Use coolers for temporary cold storage
- Invest in a quality solar-powered cooler or portable fridge
- Know your food safety rules: never open the fridge or freezer unless necessary – place a chair in front of it as a reminder, it is easy to forget!
Survivalist Chick Tip: Keep a list of what’s in your freezer taped to the outside. That way, you don’t need to open it to know what’s inside.
Step 4: Charge Up Now, Not Later
When the power’s gone, you’ll wish you had charged everything. Keep your essential devices ready for action.
Must-haves:
- Fully charged power banks
- Solar chargers for phones, fans, and radios
- Hand-crank emergency radios (with USB output)
- Backup battery bank for laptops or tablets
Survivalist Chick Tip: Charge your power banks weekly, even if you haven’t used them. Batteries slowly drain even when idle.
Step 5: Stay Cool (or Warm) Without Power
Extreme temperatures can be deadly. Your comfort items may become your most vital survival gear.
For heatwaves:
- Battery or solar-powered fans
- Cooling towels
- Blackout curtains
- Shade tarps for windows
For winter storms:
- Mylar blankets
- Layered clothing
- Safe indoor propane heaters (like Mr. Heater Buddy)
- Hot water bottles (can be warmed on a camp stove)
- Down or wool blankets
- Hat
Survivalist Chick Tip: Insulate one room and hunker down. It’s easier to regulate temperature in a single space than an entire house.
Step 6: Secure Clean Water
Municipal systems may fail in prolonged outages. You need water for drinking, cooking, and hygiene. If the storm could affect water supply (especially for hurricanes, tropical storms, earthquakes, etc) then this should be a priority.
Water prep list:
- Store at least 1 gallon per person per day (3-day minimum)
- Fill bathtubs and sinks if a blackout is imminent
- Keep a gravity-fed or pump water filter on hand
- Stock water purification tablets or bleach
- You will need extra water to flush toilets, as many won’t work to refill tank
Survivalist Chick Tip: Use collapsible water containers for easy bathtub fills, lightweight when empty, lifesaving when full.
Step 7: Stay Informed
No power means no Wi-Fi. But staying connected can save lives.
Your emergency communication kit:
- NOAA hand-crank or solar weather radio
- Walkie-talkies for local communication
- Pre-downloaded emergency apps or maps on your phone, with paper maps for backup
- Emergency contact list printed out and stored in your kit
- Enough cellular data on your phone to be able to access emergency information
Survivalist Chick Tip: Join your local neighborhood watch or prepper group. When the grid fails, your neighbors become your network.
Final Thoughts from Survivalist Chick
Power outages aren’t a far-off possibility. They’re already happening more often and they hit hardest when you’re not ready. But with a few smart tools, a clear plan, and a calm mindset, you can ride out the darkness with confidence.
Start small. Prep your lighting. Stock your water. Practice your off-grid cooking. You don’t have to overhaul your life overnight, but you do need to start.
Because when the lights go out, you don’t want to be left in the dark.
You’ve got this.
—Survivalist Chick

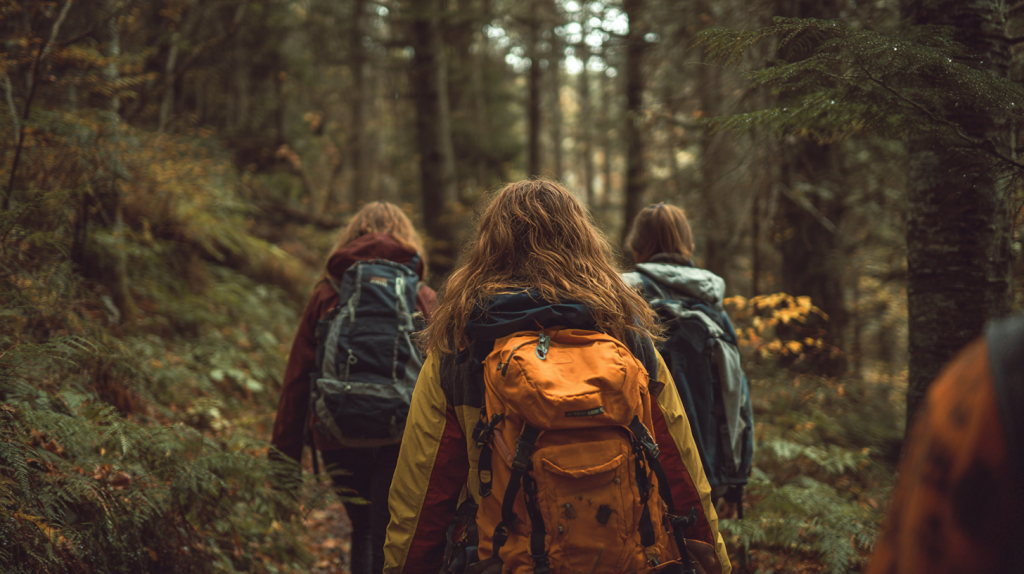
When you’re bugging out with teenagers, you’re not just hauling gear, you’re leading a mission with a crew that’s halfway grown, halfway grumpy, and 100% watching your every move. Teenagers come with strong opinions, deep emotions, and a need to feel in control. But here’s the thing: done right, your teen can go from eye-rolling liability to your most capable ally in a crisis.
Even for trial runs, teenagers can push back on what they want versus what you want. This isn’t about battling it out with your kids, but rather figuring out how to work together the best, in a crisis situation or during trial or practice runs so you can be prepared in the event you need to do it for real.
This isn’t about sugarcoating the situation. Teens may be taller and stronger, but they still need emotional guidance, structure, and clear expectations. They’re old enough to help in serious ways, but they’re also still learning how to regulate stress, fear, and fatigue. That’s where you come in. The more involved they are in planning and responsibility, the more they’ll rise to meet the moment.
Step 1: Make Them Part of the Plan
Teenagers crave independence. Use that to your advantage. Bring them into the planning process early and treat them like an essential member of the survival team. Show them the maps. Talk through potential scenarios. Give them ownership over parts of the bug-out plan.
Let them know you trust them with real responsibility. This is where you plant the seed: You’re not just along for the ride, you’re part of the mission.
What to include:
- Review your bug-out routes together and let them help scout or test walk
- Assign roles: navigator, lookout, gear manager, communications, etc.
- Share your “why” behind prepping without lecturing or panic
- Talk logistics like fuel, water points, or recon stops
Survivalist Chick Tip: Let them carry the map or compass during practice runs. Teaching + trust = leadership.
Step 2: Build a Teen-Approved Bug-Out Bag
Teens can carry more weight than small kids, but they also tend to resist anything that feels “uncool” or unnecessary. Keep their bug-out bags practical, light enough for a day’s hike, or larger for overnight trips and filled with items they helped pick out. Then add a few “morale boosters” for when stress hits hard.
Help them understand that their bag equals their personal survival kit. No one else will carry their things. This bag is theirs to own, maintain, and protect.
What to pack:
- Lightweight gear: sleeping roll, compact shelter, hygiene kit
- Emergency food and water (or a filter straw they know how to use)
- Power bank for phone (solar charger if possible)
- Clothing layers, rain poncho, durable shoes
- Flashlight or headlamp
- Compact first aid kit
- Copies of ID and important contacts
- Notebook and pen
- Morale items: gum, hoodie, earbuds, card game, etc.
Survivalist Chick Tip: Include one or two “non-negotiable” family item in every teen bag, like a mini med kit or walkie-talkie, and let them pick one item just for comfort.
Step 3: Train Before Trouble Hits
Teens thrive when they feel capable. That means skills matter just as much as gear. The best way to prep a teen for bugging out is to practice with them. Keep it low-pressure and empowering, not panic-filled or condescending.
When your teen knows how to purify water, build a fire, and patch a blister, you’ve given them the tools to face chaos with confidence.
Skills to teach:
- Starting a fire with different tools
- Map reading and compass use
- Basic first aid (blisters, wounds, allergic reactions)
- Situational awareness and threat identification
- Water purification methods
- Packing and balancing a go-bag
- Signaling and communication
Survivalist Chick Tip: Create a mini “Teen Survival Challenge” with rewards—turn training into a game, not a lecture.
Step 4: Manage Emotions, Attitudes, and Motivation
Let’s face it, teenagers can be unpredictable. One moment they’re laser-focused, the next they’re sulking or spiraling into worst-case scenarios. You’ll need to lead with calm confidence, give space when needed, and keep the emotional temperature in check without losing your cool.
Set expectations early. Talk about teamwork, attitude, and roles during a crisis. Let them vent privately if needed, but don’t tolerate full shutdowns. Remind them that in a bug-out scenario, every person counts and they’re old enough to carry that responsibility.
How to keep things on track:
- Use humor to defuse tension
- Validate their fear without letting it take over
- Set goals during movement: “We make it to X by 2 p.m.”
- Give praise for every win, big or small
- Take breaks, hydrate, and don’t skip meals
Survivalist Chick Tip: If your teen is starting to spiral, give them a job—distraction through responsibility is a powerful stabilizer.
Step 5: Pick Your Battles (Seriously)
When bugging out with teens, you’re not aiming for perfection—you’re aiming for cooperation, endurance, and emotional survival. That means sometimes you have to let go of the little things. Arguing over a hoodie they insist on bringing or rolling your eyes at the makeup they tuck into their bag? That energy is better spent making sure they stay calm, mobile, and emotionally balanced when it counts.
Let your teen express themselves within limits. If your daughter feels better bringing a small makeup kit, let her. Confidence matters in a crisis, even if it comes from lip gloss. If your son insists on a specific hoodie or a video game to distract himself, weigh the cost versus the comfort. The key is setting boundaries without turning it into a power struggle. You’re the adult, but they’re not little kids anymore—and respecting that makes a big difference in how well they follow your lead.
Examples of healthy compromise:
- Allow a small makeup pouch, not a full kit
- Bring a journal and pen rather than an iPad.
- Limit entertainment to lightweight items like earbuds or a compact game
- Set a “comfort item” limit, one or two morale boosters max
- Let them choose their own clothes within your guidelines for warmth and durability
- Allow them to suffer from their own consequences during test runs, if they make their pack to heavy.
Survivalist Chick Tip: The more control you give them over small decisions, the more buy-in you’ll get on the big ones. Let them feel heard, because in a crisis, emotional stability can matter just as much as physical survival.
Step 6: Teach Real Skills They’ll Actually Use
Teenagers don’t want to sit through lectures. They want to do. So when you’re out running drills or on a trial bug-out, lean into hands-on skills that feel practical, empowering, and maybe even a little cool. You’re not just prepping them for emergencies, you’re giving them the confidence to lead and assist you when things go sideways. That’s something every teen needs, even in everyday life.
Don’t overwhelm them with everything at once. Start with core survival skills and build from there. Let them fail a few times so they can troubleshoot and figure it out. Praise effort, not perfection. And if they end the day feeling like they mastered something you used to handle for them? That’s the kind of win that builds real-world resilience.
High-impact survival skills for teens:
- Fire building with matches, ferro rods, or even a magnifying glass
- Water purification using a filter, tablets, or boiling
- Basic navigation with a map and compass (don’t rely on phones!)
- Tent or tarp shelter setup solo or with a team
- Cooking over an open flame or camp stove
- Basic first aid (splints, bandages, recognizing dehydration)
- Packing and carrying a load efficiently for long walks
- Using a radio or signal mirror to communicate without phones
- Situational awareness and practicing “what would you do” scenarios
Survivalist Chick Tip: Let them teach back what they learn. If they can show a friend or sibling how to do something, it locks in the skill—and gives them a leadership moment they can be proud of.
Step 7: Normalize the Prep & Invite a Friend
Teenagers are more likely to engage with survival practice if it feels social rather than survivalist. Letting them bring a friend on trial runs or weekend hikes doesn’t just improve their mood, it turns a “boring bug-out drill” into something fun and peer-connected. When teens feel like the experience is theirs, not just something you’re forcing on them, they’re more present, more cooperative, and more likely to retain what they learn.
This strategy has a bonus: it brings other families into the fold without setting off alarms. Reframe it as a “skills camping trip” when talking to other parents. You’re not prepping for the end of the world, you’re teaching teens how to build fires, purify water, read a map, and be outdoors-savvy. If the other teen leaves wanting a go-bag of their own, even better. Now your teen has a friend to train with, and you’ve helped spread preparedness in your community without sounding like a doomsday siren.
Ideas to keep it fun and practical:
- Host a “backyard bug-out” if you don’t have easy access to wilderness camping, with tents, taste testing MREs (even try it blindfolded to identify foods!), and challenges
- Create team skills games: fire-starting races, scavenger hunts, camp set-up contests
- Let the teens co-plan part of the trip or training day. You might be surprised at what they want to learn.
- Have a backup kit ready for guests so their parents feel safe
Survivalist Chick Tip: Want buy-in from other parents? Frame it as “teaching independence and confidence in the outdoors” with bonus real-world survival skills. That lands better than, “In case the grid goes down.”
Step 8: Reinforce Trust, Even After the Worst
After you’ve bugged out, or even after a practice run, debrief with your teen. Ask what worked, what felt hard, and what they would do differently next time. Show that you trust their instincts and value their input.
Survival is about more than staying alive. It’s about growing stronger, together. When your teen sees that they were part of something that mattered, they’ll carry that strength for the rest of their life.
Debrief topics:
- What did you learn?
- What gear do we need to improve?
- What surprised you?
- What was hardest for you mentally or emotionally?
- What would you change about our plan?
Survivalist Chick Tip: Keep a shared “after-action journal” where you write down notes together from each bug-out practice. Over time, it becomes a manual you built as a team.
Final Thoughts from Survivalist Chick
Your teenager might not say it, but they’re watching you. They’re learning how to handle fear, solve problems, and push through hard days by watching how you prep, lead, and respond.
Bugging out with teens is a challenge, yes, but it’s also a chance to raise the next generation of leaders. The world may be unpredictable, but when your teen knows they’re capable, useful, and trusted, that’s when they rise.
So prep with them. Teach them. Empower them. You’re not just building a bug-out plan. You’re building a resilient family.
You’ve got this.
—Survivalist Chick

15 Tasty Ways to Use Dehydrated Veggies in Survival Meals
How to Cook Without Power: 10 No-Electricity Meal Hacks That Actually Work

20 Things You Should Have in Your First Aid Preps, But Probably Don’t

How to Prepare for Power Outages: A Guide to Staying Safe When the Lights Go Out

How to Pack Your Vehicle for a Fast Evacuation With Kids: Family-Friendly Systems That Work

Beyond Coffee: 11 Caffeine Sources Every Survivalist Should Prep For

15 Easy Ways to Make Plain Rice Taste Amazing (Prepper & Budget-Friendly Hacks)

18 Canned Goods Everyone Should Stockpile for a Prepper Pantry

10 Survival Skills Every Woman Should Know Before the Grid Goes Down

30+ Foods with a Long Shelf Life Every Survivalist Chick Should Stock Up On

- 15 Tasty Ways to Use Dehydrated Veggies in Survival Meals

- How to Cook Without Power: 10 No-Electricity Meal Hacks That Actually Work

- 20 Things You Should Have in Your First Aid Preps, But Probably Don’t

- How to Prepare for Power Outages: A Guide to Staying Safe When the Lights Go Out

- How to Pack Your Vehicle for a Fast Evacuation With Kids: Family-Friendly Systems That Work

- What to Do If Your Bug-Out Vehicle Breaks Down Mid-Evacuation

- Urban Bug-Out by Vehicle: How to Escape a City Fast Without Drawing Attention

- Survivalist Chick Guide: Hobbies That Make You Apocalypse-Ready

- Beyond Coffee: 11 Caffeine Sources Every Survivalist Should Prep For

- 18 Canned Goods Everyone Should Stockpile for a Prepper Pantry

- Bugging Out with Teenagers: Turning Attitude Into Asset
- Survival Tomatoes: The 12 Best Heirloom Varieties to Grow for Canning and Eating


15 Tasty Ways to Use Dehydrated Veggies in Survival Meals
How to Cook Without Power: 10 No-Electricity Meal Hacks That Actually Work
20 Things You Should Have in Your First Aid Preps, But Probably Don’t
Beyond Coffee: 11 Caffeine Sources Every Survivalist Should Prep For
15 Easy Ways to Make Plain Rice Taste Amazing (Prepper & Budget-Friendly Hacks)
18 Canned Goods Everyone Should Stockpile for a Prepper Pantry
-
 Food Storage1 year ago
Beyond Coffee: 11 Caffeine Sources Every Survivalist Should Prep For
-
 Cooking & Recipes1 year ago
15 Easy Ways to Make Plain Rice Taste Amazing (Prepper & Budget-Friendly Hacks)
-
 Food Storage1 year ago
18 Canned Goods Everyone Should Stockpile for a Prepper Pantry
-
Safety1 year ago
10 Survival Skills Every Woman Should Know Before the Grid Goes Down
-
Food Storage1 year ago
30+ Foods with a Long Shelf Life Every Survivalist Chick Should Stock Up On
-
 Survival4 years ago
How to use a sillcock water key for emergency water access
-
 Survival Prep Item4 years ago
Can you sterilize sewing thread in boiling water?
-
 Cooking & Recipes1 year ago
15 Tasty Ways to Use Dehydrated Veggies in Survival Meals