
Homestead
8 Best Beginner Chicken Breeds for Fresh Eggs (No Farm Experience Needed!)
If you’ve ever dreamed of gathering warm eggs from your backyard each morning, raising chickens might be the perfect first step toward food security and self-reliance.


If you’ve ever dreamed of gathering warm eggs from your backyard each morning, raising chickens might be the perfect first step toward food security and self-reliance. You don’t need a farm, years of experience, or even a huge yard to get started, just a little knowledge and the right breeds. Choosing beginner-friendly chickens can make all the difference between a stressful mess and a smooth, rewarding experience.
Some chicken breeds are naturally better suited for first-time keepers. They’re more docile, more disease-resistant, and more consistent with their egg production. These hens are easy to care for, adapt well to both backyard coops and free-ranging setups, and don’t mind a little handling. Whether you’re in the suburbs, the countryside, or prepping on a small lot, there’s a breed that will work for your lifestyle.
In this guide, we’ll break down the best chicken breeds for beginners who want steady eggs and low-maintenance care. From friendly Buff Orpingtons to colorful egg layers like Easter Eggers, you’ll find the ideal match to start your flock strong. no guesswork, no drama, just good hens and great eggs.
Top Beginner-Friendly Chicken Breeds for Eggs
Rhode Island Red
- Eggs: ~250–300 brown eggs per year
- Temperament: Hardy, independent, low-fuss
- Why beginners love them: These are classic “do-it-all” chickens. They’re super resilient in all weather, rarely get sick, and lay like champs.
Plymouth Rock (Barred Rock)
- Eggs: ~200–280 brown eggs per year
- Temperament: Calm, friendly, great with kids
- Why beginners love them: Their docile personalities make them ideal for family flocks, and they’re easy to handle even if you’ve never owned chickens before.
Australorp
- Eggs: ~250–300 brown eggs per year
- Temperament: Gentle, quiet, easygoing
- Why beginners love them: These girls are egg-laying machines with soft temperaments. They adapt well to confinement or free range.
Buff Orpington
- Eggs: ~200–280 light brown eggs per year
- Temperament: Affectionate, mellow, social
- Why beginners love them: Often called the “golden retrievers” of chickens, Buff Orpingtons are sweet, fluffy, and a great choice if you want a pet-like bird with strong laying ability.
Leghorn
- Eggs: ~280–320 white eggs per year
- Temperament: Energetic, independent
- Why beginners love them: These are lean, athletic chickens that produce a lot of eggs. They aren’t as cuddly but make up for it with sheer productivity.
Easter Egger
- Eggs: ~200–280 eggs per year in blue, green, or pink shades
- Temperament: Friendly, quirky, adaptable
- Why beginners love them: Not a true breed, but a hybrid. They’re fun to have in the flock and lay beautiful colored eggs that make breakfast feel a little more magical.
Sussex
- Eggs: ~250–275 light brown eggs per year
- Temperament: Curious, cuddly, very tame
- Why beginners love them: Sussex are friendly and smart, often following you around like little garden helpers.
Golden Comet
- Eggs: ~280–320 brown eggs per year
- Temperament: Calm, excellent producers
- Why beginners love them: This hybrid breed was created for egg production. They mature quickly and start laying early, making them a practical choice for first-time flock keepers.
Survivalist Chick Tips for Picking Your Starter Flock
- Aim for variety: Choose a mix of breeds to diversify egg color, behavior, and hardiness.
- Stick with hens: No need for a rooster unless you want fertilized eggs—hens lay just fine without one.
- Buy pullets (young hens): Around 4–6 weeks old is ideal for raising them easily without dealing with delicate chicks.
Final Thoughts from Survivalist Chick
Starting with chickens is one of the smartest (and most satisfying) prepping moves you can make. Eggs are protein-packed, versatile, and barter-worthy—and the chickens give you entertainment and compost while they’re at it. With the right breeds, even a total beginner can build a thriving little egg operation in her own backyard.
You got this!
—Survivalist Chick

Food Storage
Beyond Coffee: 11 Caffeine Sources Every Survivalist Should Prep For
The best non-coffee caffeine options you should stockpile (and plant) now, because a caffeine-deprived meltdown is not the vibe we’re going for when things get tough.

You might love your morning cup of joe, but when the grid goes down, your Keurig isn’t going to save you. In a long-term emergency, staying sharp, alert, and energized can make all the difference, whether you’re on night watch, dealing with physical fatigue, or just needing a mental boost after days of stress and low sleep.
Coffee will also have huge value on the black market in an apocalypse scenario, so if you can use your coffee for bartering, while getting your caffeine from other sources, you are far ahead of the game.
But what if coffee runs out? Or your body can’t tolerate it? That’s where prepping alternative caffeine sources gives you a serious edge. The best part? Some of them you can grow yourself, stash in your bug-out bag, or brew over a campfire.
Let’s break down the best non-coffee caffeine options you should stockpile (and plant) now, because a caffeine-deprived meltdown is not the vibe we’re going for when things get tough.
1. Black and Green Tea
Black and green teas are two of the most accessible and widely consumed non-coffee caffeine sources around the world. They come from the same plant, Camellia sinensis, but are processed differently. Black tea is fully oxidized, giving it a robust, bold flavor, while green tea is minimally processed to preserve its lighter, earthy notes. Both provide a moderate caffeine kick, typically ranging from 30 to 70 mg per cup. They also contain L-theanine, an amino acid that calms the nervous system and smooths out the energy spike, making tea a gentler, steadier option than coffee in high-stress survival scenarios.
From a prepper’s perspective, black and green tea are easy to store, last a long time, and are lightweight enough to stash in bug-out bags or cache kits. Vacuum-sealed bags or individually wrapped tea bags will keep your stash fresh for years if stored in a cool, dark place. Beyond their caffeine content, these teas offer immune support, antioxidants, and hydration, a triple win in any survival setting. Even better, you can use tea for more than drinking: cold black tea works as an eye compress for swelling or fatigue, and brewed green tea can be used for cleaning minor cuts or rashes.
While you can sometimes save a bit of money with loose tea, from a prepper perspective, it can take much longer, is much more prone to spillage, and also means you cannot re-use tea bags as needed. For this reason, I prefer tea in bags.
Also, be certain you don’t accidentally purchase the decaffeinated versions!
Prep Tip: Stock vacuum-sealed or individually wrapped tea bags for long shelf life. Loose leaf teas can be stored in mylar with oxygen absorbers.
Growable? Sort of. Traditional tea (Camellia sinensis) can grow in warm, humid climates (think Zone 8+), though it’s a commitment. If you’re in the right region, it’s a great homestead addition.

- LIPTON BLACK TEA: Indulge in a Lipton black tea with a blend of orange pekoe, pekoe cut black tea...

- Delicate Green Tea: Our Classic Green Tea provides essential antioxidants making it delicious and...
2. Yaupon Holly (Growable U.S. Native Caffeine Source)
Yaupon holly is one of the best-kept secrets in American prepping. It’s the only plant native to the U.S. that naturally contains caffeine, and it’s been used for centuries by Indigenous peoples for energy, clarity, and ceremony. The leaves of Ilex vomitoria (don’t worry, the name is misleading) can be harvested, dried, and brewed into a smooth, clean-tasting tea with a mild caffeine content. Unlike coffee, it doesn’t cause jitteriness and contains theobromine, which gives a pleasant mood lift and can help ease anxiety.
What makes yaupon a powerhouse prepper plant is its growability and sustainability. It thrives in Zones 7 through 10, is drought tolerant, and is evergreen, meaning you can harvest year-round. A few mature bushes can easily support a family’s caffeine needs long-term. You can roast the leaves lightly to deepen the flavor or mix them with herbs like mint or citrus peel to make your own signature survival tea blends. Store the dried leaves in airtight containers, and you’ve got a long-lasting caffeine source that doesn’t rely on imports or modern supply chains.
How to use: Dry the leaves, roast lightly, then steep for a clean, earthy tea with caffeine. You can sweeten with honey or blend with mint.
Grow it yourself: It’s easy to grow in Zones 7–10, drought-tolerant, and beautiful in a survival garden.
Survivalist Chick Tip: Blend Yaupon with dried citrus peel and a pinch of cinnamon for a DIY “morning zest” tea.
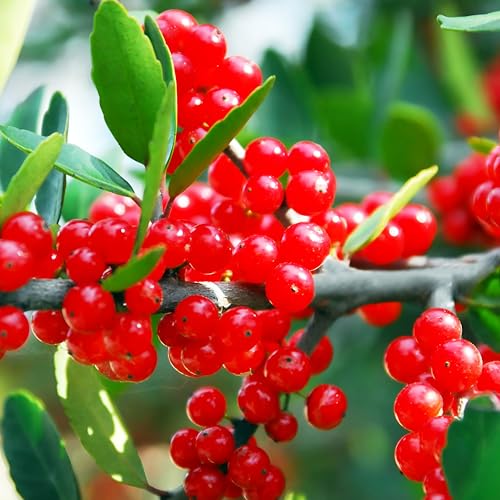
- High Germination Rate: Our holly bush seeds for planting boast up to 90% success with proper care....
3. Caffeinated Drink Mixes & Tablets
Caffeinated drink mixes and electrolyte tablets are a brilliant addition to any prepper’s go kit. These small, single-serve packets contain caffeine, vitamins, and sometimes electrolytes, making them perfect for quick boosts of energy when you’re physically drained. Brands like MiO Energy, GU, and Nuun offer options that can be poured into a water bottle for an instant pick-me-up with no boiling water or steeping required. That makes them ideal for situations where you’re on the move and need to stay sharp.
Their portability is their biggest strength. A handful of these in a side pouch weighs virtually nothing, but they can provide a mental reset when you’re facing long hikes, bug-out routes, or night watch rotations. They’re also discreet and fast-acting. Look for versions without artificial sweeteners or dyes if you’re sensitive to additives. Since many of these include electrolytes, they’re doubly useful during hot weather or illness, when dehydration can set in fast. For prepping purposes, choose sealed tablets or dry mixes for the longest shelf life and ease of storage.
Why prep them: Lightweight, portable, and shelf-stable for years depending on the type. These can keep you going during bug-outs, long hikes, or watch duty when energy slumps.
Watch out for: Artificial ingredients. Try to choose ones without aspartame or dyes if possible.

- SPORT HYDRATION WITH A CAFFEINE BOOST: Nuun Sport + Caffeine electrolyte tablets deliver a gentle...
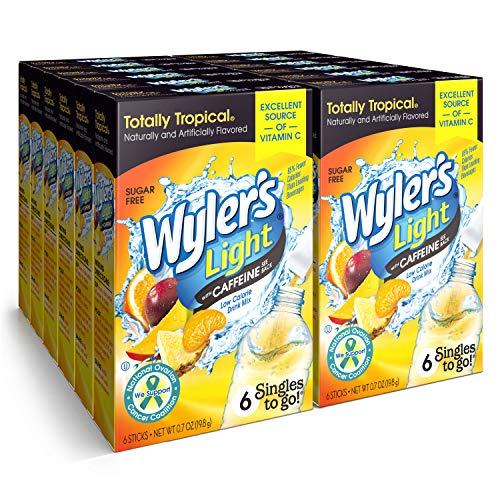
- 96 TOTAL SERVINGS: Each case contains 12 boxes of Wyler’s Light, each box has 8 tasty packets of...

- ENHANCE YOUR ACTIVE LIFESTYLE: Keep a tube in your gym bag, car, purse, desk, hiking pack or...
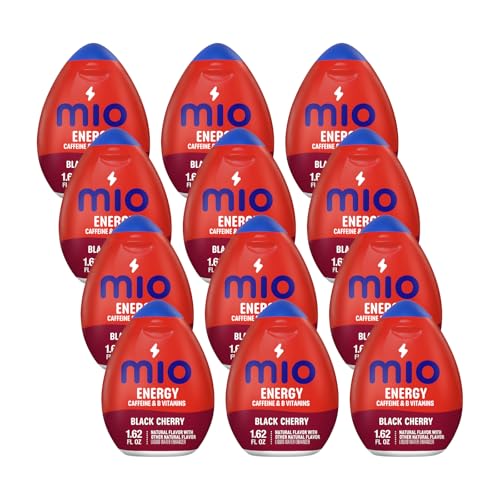
- Give water a boost of caffeine and B vitamins with Mio Energy Naturally Flavored Black Cherry Liquid...
4. Yerba Mate
Yerba mate comes from the Ilex paraguariensis plant and is a staple energy drink across much of South America. It delivers roughly 85 mg of caffeine per serving, putting it almost on par with coffee, but many users report that it produces a smoother, longer-lasting energy boost without the crash. Yerba mate also contains theobromine and other beneficial compounds, making it an all-around mood enhancer and mental stimulant.
Although it’s not easily grown in most of North America unless you have a tropical climate, it’s widely available in loose-leaf or bagged forms for long-term storage. Yerba mate is often sipped through a gourd and metal straw (bombilla), but you can brew it like regular tea. For a survival twist, try cold brewing it in a jar of water and letting it steep in the sun. If you’re prepping for grid-down scenarios, mate is a fantastic item to barter or trade, especially with caffeine-addicted friends and neighbors looking for something familiar. Store it in a sealed container away from moisture for best results.
Storage Tip: Buy it loose leaf in vacuum-sealed bags for long shelf life. It’s available roasted or unroasted depending on your flavor preference.
Grow it? Only in tropical/subtropical climates, so most will need to stock this one rather than grow it.
Flavor profile: Earthy, grassy, and slightly bitter. Add lemon or honey to cut the bite.

- MAGIC FOR YOUR MIND & BODY: Each scoop of Yerba Magic blends yerba mate, lion’s mane mushroom,...
5. Dark Chocolate & Cacao Nibs
Chocolate isn’t just a comfort food, it’s a low-key survival staple. Dark chocolate, particularly 85% cacao and higher, contains both caffeine and theobromine, a gentle stimulant that increases alertness and focus without the intensity of coffee. It also boosts serotonin and endorphin levels, helping combat the emotional exhaustion that often comes with crisis. A few squares of dark chocolate can act like a mental reset button during high-stress or high-demand moments.
Cacao nibs are even more shelf-stable than bars and can be used in trail mixes, eaten raw, or ground into a hot drink. They’re lightweight, rich in antioxidants, and require no prep, just open and eat. You can store cacao nibs in mylar bags or glass jars with oxygen absorbers for long-term use. For preppers who value morale as much as nutrition, having a chocolate stash can be a game-changer, especially when bugging out with kids or navigating high-pressure group dynamics. The ability to trade or share a piece of chocolate may be more valuable than you think.
Why prep it: Sealed dark chocolate bars (85% cacao or higher) store well in cool, dry conditions. Cacao nibs last even longer and can be eaten straight, used in trail mix, or ground into hot drinks.
Bonus: Chocolate improves morale. And let’s be honest, emotional comfort has a place in survival.

- Twelve (12) 3.5 oz. Bar of Lindt EXCELLENCE 90% Cocoa Dark Chocolate Bar
6. Guayusa
Guayusa (pronounced gwhy-you-sa) is a lesser-known cousin of yerba mate, harvested from a holly tree native to the Amazon rainforest. It contains a similar caffeine content, between 40 to 90 mg per cup, but with a smoother energy profile and virtually no bitterness. Guayusa has been traditionally used by Indigenous Ecuadorian communities for stamina and mental clarity, often brewed before early-morning hunts. It provides a balanced, jitter-free focus thanks to its natural theobromine and antioxidants.
Although it’s not something you can grow easily in North America, guayusa is increasingly available as a shelf-stable tea. It comes in loose-leaf or bagged versions and has a sweet, almost floral taste that pairs well with herbs like lemongrass or ginger. For a prepper pantry, guayusa makes a great addition to your tea rotation, especially if you’re looking for a less acidic, gentler alternative to black tea or yerba mate. Keep it sealed in a dry, cool space and it’ll last for years, ready to steep when your energy starts to lag.
How to prep: Available dried in loose leaf or bagged form. Seals well in mylar for years of storage.
Survivalist Chick Tip: Try blending guayusa with peppermint and rosehips for an immune-boosting energy tea.
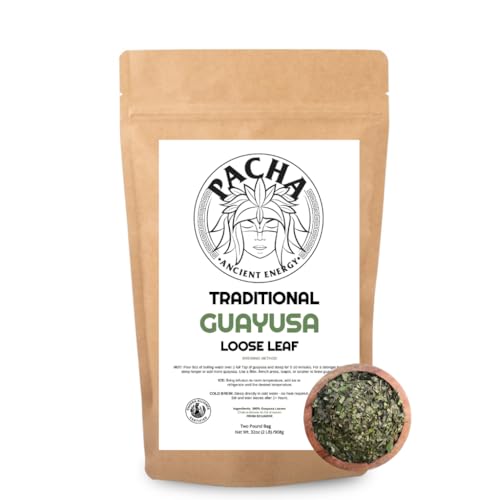
- ✓ CHAKRA ALLIANCE CERTIFIED | Our guayusa loose leaf is naturally grown in Amazonian chakra...
7. Matcha
Matcha is powdered green tea, made from shade-grown leaves that are stone-ground into a fine, vibrant powder. Unlike steeped tea, where you discard the leaves, drinking matcha means consuming the entire leaf, giving you higher levels of caffeine and nutrients. One serving provides roughly 70 mg of caffeine, but thanks to its high L-theanine content, the energy it gives is more of a calm, sustained alertness than a spike-and-crash.
From a survivalist standpoint, matcha’s biggest strength is its shelf-stable powdered form. It takes up very little room and can be mixed into water, milk, smoothies, or even baked goods for a nutritious boost. It also contains chlorophyll, which supports detoxification, and EGCG, a powerful antioxidant. If you’re prepping for long-term scenarios where coffee is off the table, matcha is a clean and versatile replacement. Just be sure to store it in an airtight container away from light, as it can lose potency quickly when exposed to air or moisture.
How to Prep: Stock up on ceremonial or culinary grade matcha powder in sealed tins or vacuum-packed pouches. Keep it in a cool, dark space such as a root cellar, airtight bucket, or mylar bag with an oxygen absorber to preserve freshness. Pair it with a small bamboo whisk or tiny shaker bottle to mix easily with water when you’re on the move.
Survivalist Chick Tip: Matcha isn’t just for sipping. Stir a little into oatmeal, pancake mix, or energy bars for a steady caffeine boost that also calms nerves and sharpens focus. In high-stress survival situations, that balance between alertness and calm is gold.

- Natural unsweetened organic matcha powder. Fresh culinary grade raw ingredients. Real Japanese green...

- Special Features – Organic certified culinary grade matcha that is naturally unflavored without...
8. Kola Nut
Kola nuts are the original source of caffeine in cola beverages and come from the Cola species of trees, native to West Africa. They’re incredibly caffeine-rich, up to 3.5% by weight, making them one of the most potent natural sources available. In a survival context, just a small piece of dried kola nut can provide a quick, portable dose of alertness and mental clarity.
You can chew the nut directly, grind it into powder for a tea-like drink, or even infuse it into energy tonics. While kola nuts aren’t something most North Americans can grow, they can be bought dried or powdered and stored long-term in airtight containers. They’re also rich in antioxidants and can aid digestion. For preppers looking for compact, long-lasting energy sources to include in bug-out bags or bartering stashes, kola nut is an unusual but effective addition.
How to Prep: Purchase dried kola nuts whole or in powdered form. Store in sealed containers or food-safe mylar bags with oxygen absorbers for long-term shelf life. Powdered kola nut can be brewed like tea or used to make homemade energy tinctures, and whole nuts can be chewed for a quick jolt of energy on the trail.
Survivalist Chick Tip: Use powdered kola nut in small amounts. It’s potent and can easily be blended with cocoa, cinnamon, or dried fruit powders to create your own “bush cola” survival drink. Just a pinch in warm water can carry you through the toughest stretch of your bug-out route.

9. Ginseng (Panax)
While not caffeinated in the traditional sense, ginseng deserves a place in this list because it’s a powerful adaptogen and natural energy enhancer. It doesn’t contain caffeine, but it boosts stamina, improves mental clarity, and combats fatigue, especially during stressful situations. Panax ginseng, in particular, is widely used in traditional Chinese medicine to support resilience and vitality.
Prepper-wise, dried ginseng root or powdered capsules are easy to store and have an incredibly long shelf life. You can grow certain varieties like American ginseng (Panax quinquefolius) in shaded woodland environments, making it a viable homestead crop. Brew it as a tea, chew on dried pieces, or use it in tinctures to boost your endurance without overstimulating your nervous system. For long-haul prepping and grid-down scenarios, ginseng is a trusted herbal ally that won’t let you crash or burn out.
How to Prep: Store dried ginseng root slices or powdered capsules in cool, airtight conditions. You can also make your own tincture by soaking slices in high-proof alcohol for 6–8 weeks, then storing in dropper bottles. Consider growing American ginseng in shaded corners of your yard or forested homestead for a long-term, renewable source.
Survivalist Chick Tip: Ginseng is a great tool for hormonal support during survival stress, especially for women. Use it when you need to think clearly, stay awake during a night shift, or maintain stamina without the crash of coffee. It’s your herbal backup battery when the mental fog rolls in.
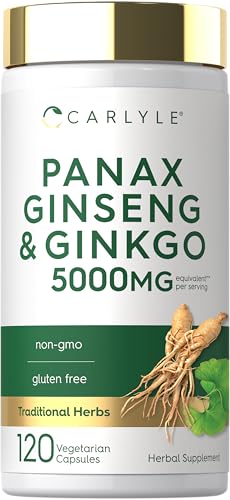
- COMBINED BOTANICALS: Two beneficial botanicals, Ginseng and Ginkgo Biloba, in one unique formula
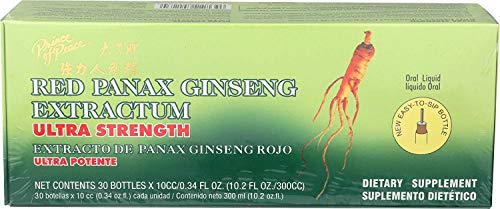
- Red Panax Ginseng Extractum Ultra Strength
10. DIY Caffeinated Herbal Tea Blends You Can Grow
If you want caffeine security that doesn’t rely on imports or stores, growing your own is the way to go. While black and green teas come from Camellia sinensis, which grows best in Zones 7 and warmer, there are other blends you can grow and mix yourself to simulate a morning pick-me-up. Blending homegrown herbs with caffeinated leaves like yaupon can stretch your supply while adding flavor and medicinal benefits.
Great grow-at-home herbs for caffeine-style blends include peppermint (for clarity and digestive ease), lemon balm (for calming), spearmint (uplifting), lavender (mood support), and even dried citrus peels (for flavor and vitamin C). If you have yaupon holly or a small tea bush, you can dry the leaves and mix your own blend for a custom “Survivalist Chick Tea.” Store herbs in mason jars or mylar pouches with oxygen absorbers for maximum shelf life. This kind of DIY tea not only provides energy but gives you comfort, warmth, and routine, three things that matter deeply when things fall apart.
Best caffeine-adjacent herbs to grow:
- Peppermint: Refreshing and increases alertness. Easy to grow in pots.
- Ginseng: Natural adaptogen that supports energy and endurance. Grow in shaded areas, takes a few years to mature.
- Lemon Balm + Ginger Root: Combine for mental clarity and digestive support.
Bonus blend: Dried ginger + ginseng + peppermint + cacao nibs = Survivalist Chick’s “Wake Up and Hustle” tea.

- HIGH GERMINATION FOR SUCCESSFUL GROWTH – Grow vibrant peppermint plants with a high germination...

- Roots are 4 year old transplant roots

- Sprout Quickly and Effortlessly - Achieve a quick start with our lemon balm seeds, boasting an...

11. Caffeine Pills or Gum
Caffeine pills are one of the most space-efficient and budget-friendly caffeine options for preppers. They contain a precise dose, usually 100 to 200 mg, making it easy to track intake and ration supply. Unlike coffee or tea, they require no prep, no water, and no heat, which is crucial in scenarios where fire or cooking isn’t possible. Pills have an extremely long shelf life when kept dry and sealed, and they’re lightweight enough to carry in every bag, from your bug-out to your EDC kit.
Caffeine gum is another overlooked gem. It’s fast-acting, thanks to absorption through the cheeks and gums, and can deliver energy within minutes. Chewing also helps with alertness and stress reduction, making it doubly useful during tense situations or long hikes. You can find military-grade versions designed for tactical use or grab some civilian options like Run Gum or Military Energy Gum to stash in your gear. Both are ideal for driving, night patrols, or keeping alert when sleep isn’t an option.
Pros: Long shelf life, small footprint, no water or heat required.
Cons: Easy to overdo. Monitor closely, especially with teens.
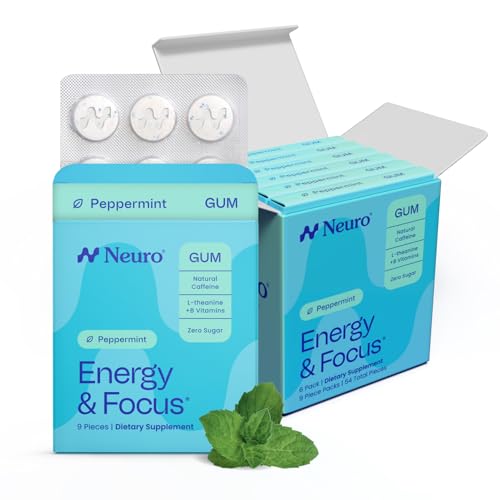
- Fast-Acting Nootropic - Our energy supplements deliver a balanced boost of energy and clarity with a...
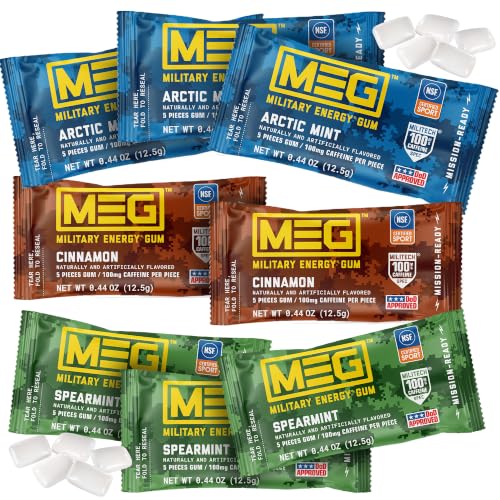
- MEG delivers caffeine to your system 5x faster than energy drinks through rapid absorption in the...
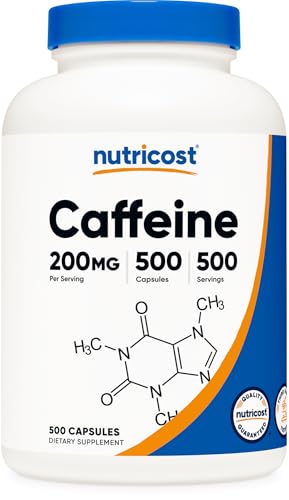
- 200mg of Caffeine Per Capsule
Final Thoughts from Survivalist Chick
Coffee’s great, but it’s not your only option. A smart prepper knows how to diversify their caffeine supply just like their food, fuel, and water. From growing your own yaupon or peppermint to keeping emergency caffeine tablets tucked in your go bag, you’ve got choices.
So next time someone side-eyes your herbal tea stash or cacao nib stockpile, smile and sip your energy booster in peace, because when the caffeine runs dry, you’ll still be ready to roll.
Stay sharp. Stay caffeinated. Stay fierce.
—Survivalist Chick
Homestead
How to Set Up a Rainwater Storage Barrel & What You Need to Know
Learn how to collect and store rainwater safely with a simple DIY barrel system—perfect for prepping, gardening, or off-grid living.

Step-by-step guide for collecting water you can count on when the grid goes dry.
Water is one of the most critical resources in any emergency, and yet it’s often the most overlooked. Whether you’re preparing for grid-down scenarios, drought, or just aiming for more self-sufficiency, learning to collect and store rainwater is a smart move. It’s low-cost, practical, and surprisingly simple to set up, even if you’ve never done it before.
A rainwater barrel system lets you harvest water straight from your roof. This gives you a sustainable source for your garden, sanitation, livestock, or, with proper treatment, even drinking water. With the right setup, you can collect dozens of gallons from a single rainfall. And once it’s in place, it works passively, you won’t have to lift a finger every time the skies open up.
The good news? You don’t need a full homestead or expensive gear to get started. A basic system can be built with a food-grade barrel, a few common tools, and a little weekend effort. Whether you’re in the suburbs or deep in the countryside, rainwater collection is a great entry point into prepping and off-grid readiness.
Let’s walk you through exactly how to set up a rain barrel system that works. We’ll cover where to place it, what materials you’ll need, how to keep your water clean, and whether it needs to be treated before use. Because when things go sideways, the last thing you want is to be scrambling for water.
Why Use a Rain Barrel?
A rain barrel collects and stores runoff from your roof, giving you a reliable water source for your garden, livestock, sanitation, or emergency needs. It’s simple to set up, budget-friendly, and perfect for beginner preppers who want to build real water resilience—even in an urban or suburban setting.
What You’ll Need:
- 1 food-grade rain barrel (50–80 gallons)
- Downspout diverter or rainwater collection kit
- Gutter system (already in place on most homes)
- Mesh screen (to keep out debris and bugs)
- Hose bib or spigot
- Overflow valve or hose
- Concrete blocks or sturdy stand
- Optional: first flush diverter for cleaner water
- Bleach or water treatment tabs (for post-collection treatment)
Choosing Your Rain Barrel
While the typical black plastic rain barrels are the defacto standard, as well as being the least expensive option, you also want to consider security and safety. Rain barrels could become a target in a SHTF scenario, and some rain barrels are designed to be more aesthetically pleasing – which also means you can easily disguise what they are.
For example, the imitation stonework rain barrels are much less noticeable and you can easily hide the spigots with plants or other items in the garden.
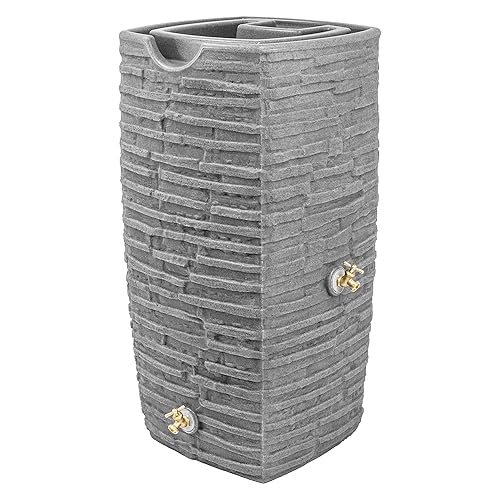
- Large Capacity: Holds up to 50-gallon of rainwater boosting your rain harvesting to new heights...
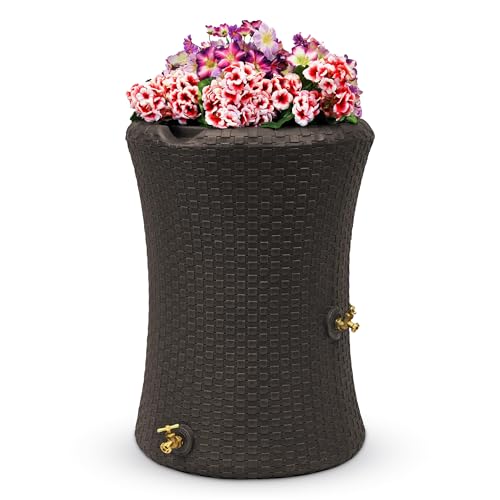
- Generous Capacity: Ample collecting and storing space with a 50-gallon capacity rain barrel with a...

- 50-Gallon Capacity: Provides ample storage for harvested rainwater, ideal for watering gardens,...
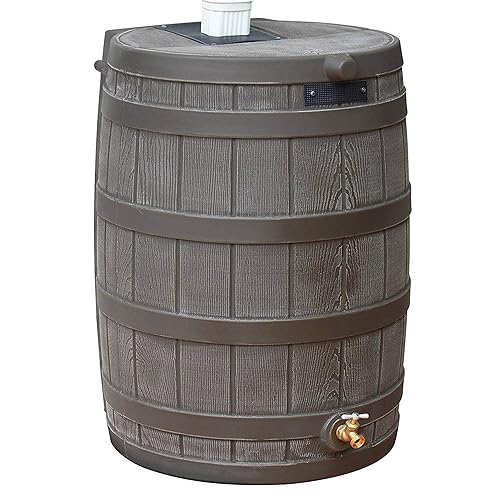
- Ensure a backup water supply for your home using the faux wood rain barrels to collect rainwater...
Step-by-Step Instructions
Step 1: Choose the Right Spot
- Place your rain barrel directly under a downspout where water naturally flows from your roof.
- Choose level ground—or level it yourself using concrete blocks.
- Raise your barrel on blocks or a platform to increase water pressure and make it easier to fill buckets or attach a hose.
Survivalist Chick Tip: Pick a shaded spot if possible to slow algae growth.
Step 2: Prep the Barrel
- Make sure your barrel is food-grade plastic (never use anything that once held chemicals).
- Drill or attach a spigot near the bottom for easy access.
- Add an overflow valve near the top so excess water doesn’t flood the area.
- Cover the top opening with fine mesh or a secure lid to block leaves, bugs, and mosquitoes.
Step 3: Install the Diverter
- Cut the downspout using a hacksaw at the appropriate height (just above the barrel’s lid).
- Attach a rain diverter kit, which channels water from the gutter into your barrel.
- Most kits include a hose or connector that leads water straight into your barrel while filtering out debris.
Step 4: Set Up Overflow Drainage
- Connect a short hose to your overflow outlet and direct it away from your home’s foundation.
- Optionally, connect multiple barrels using a hose linking each overflow to the next barrel’s intake.
Step 5: Secure It
- Strap or anchor your barrel if you’re in a windy area.
- Check that your platform is stable—remember, a full 55-gallon barrel weighs over 450 pounds.
Best Practices and Tips
- Clean your gutters at least once a season to keep water clean.
- Drain and rinse barrels once or twice a year to prevent algae or sediment buildup.
- In cold climates, drain and disconnect your barrel before the first hard freeze to avoid cracking.
Does Rainwater Need to Be Treated?
Yes. While rainwater is clean when it falls from the sky, it picks up contaminants from your roof and gutters—bird droppings, dirt, mold, or even roofing materials.
For non-drinking uses (like gardening, flushing toilets, or washing clothes):
- No treatment is needed, but you may want to screen or filter to reduce sediment.
For drinking or cooking:
- Always purify your rainwater before drinking. That means:
- Boiling for at least 1 minute (3 minutes at high altitude)
- Using water purification tablets
- Filtering through a Berkey or Sawyer system
- Disinfecting with unscented bleach (8 drops per gallon, wait 30 minutes)
Stored rainwater can also be treated with long-term water preserver drops if you plan to keep it for more than 6 months.
Final Thoughts from Survivalist Chick
A rain barrel might look simple, but it’s a power move in your prepping strategy. When everyone else is waiting in line for bottled water, you’ll already have gallons ready to go, harvested right from your own roof.
Practice now, before you need it. Tweak your setup, see how much you collect in a month, and try purifying it just like you would in a grid-down scenario.
Because prepping isn’t paranoid. It’s practical.
And with a rain barrel in place, you’re one step closer to true self-reliance.
Stay sharp and stay ready.
—Survivalist Chick
Homestead
How to Build a Female-Friendly Homestead: Garden, Defend, Thrive
You don’t need a partner, a pickup, or permission. You need a plan, some grit, and the tools to build a homestead that’s sustainable, secure, and unapologetically yours.

Why a Female-Friendly Homestead Matters
Homesteading isn’t just about growing food, it’s about creating a life you control. Whether you’re living solo, raising a family, or starting over after a major life shift, having land to call your own means reclaiming independence on your terms. But let’s be honest: most homestead content is written for couples or men with a lot of free time, upper body strength, or power tools. That’s not always reality.
A female-friendly homestead isn’t about making things soft or easy, it’s about making them smart, efficient, and manageable for one woman to run confidently. From raised beds to self-defense, this guide helps you build a space that’s strong, sustainable, and designed with your life in mind.
Section 1: Build a Garden You Can Handle
You don’t need 10 acres or a tractor to grow serious food. You need good soil, smart layout, and crops you’ll actually eat.
Tips for a Female-Friendly Garden:
- Raised beds reduce bending, keep weeds down, and make watering and harvesting easier.
- Use self-watering containers or drip irrigation to save your back and time.
- Choose low-maintenance crops like garlic, herbs, potatoes, kale, and squash.
- Install vertical supports for peas, tomatoes, or cucumbers to make harvesting easier on your knees.
- Mulch heavily to reduce weeding. You’ve got other things to do.
Survivalist Chick Tip: Start small and expand slowly. You don’t have to grow everything the first year. Win with consistency, not overwhelm.
Section 2: Tools That Make the Job Easier (Not Harder)
Homesteading doesn’t mean suffering through every task manually. Invest in tools that save your body, streamline your work, and don’t require brute strength. There are some tools that are designed specifically for women (with pink tax included) but the easier size for some women to handle might make it worth the expense.
Must-Have Tools for a Woman-Run Homestead:
- Wheelbarrow or garden cart with dual wheels (for stability and ease of use)
- Cordless electric tools like drills, saws, and weed trimmers
- Battery-operated chainsaw or mini saw for small cutting tasks
- Ergonomic hand tools with cushioned grips
- Headlamp for early mornings or emergency fixes
Survivalist Chick Tip: Set up tool storage close to where you’ll use them. Don’t hike across the property just to grab a trowel.
Section 3: Secure the Land, Defend Your Space
A female-run homestead needs to feel safe, day and night. That doesn’t mean turning it into a fortress, but it does mean thinking ahead.
Security Basics:
- Motion-sensor lights around your home and animal pens
- Thorny hedges or fencing to discourage snooping or trespassing
- Security cameras (solar or battery backup)
- Dogs with strong bark instincts, not just for companionship
- Firearms or other defense tools you’re trained and comfortable using
Survivalist Chick Tip: Build community with nearby homesteaders or neighbors. Your best alarm system is someone who knows you and checks in regularly.
Section 4: Power, Water, and Backup Systems
Self-sufficiency doesn’t mean living like it’s 1820, it means you’ve got backups and redundancies in place when the grid goes down or the pipes freeze.
Prepper-Friendly Utilities:
- Rainwater catchment barrels with first-flush diverters
- Solar power kits for basic electricity or emergency charging
- Propane camp stove or rocket stove for off-grid cooking
- Wood stove or kerosene heater for winter backup
- Composting toilet or backup bucket system if plumbing fails
Survivalist Chick Tip: Practice using your backups at least once a season. You don’t want to learn by candlelight with frozen hands.
Section 5: Thrive, Not Just Survive
You’re not just building a bug-out spot. You’re building a life you can live in peacefully and powerfully. That means creating routines, comforts, and systems that support you mentally, emotionally, and physically.
Ideas to Thrive:
- Grow a “comfort garden” with flowers or herbs just because they make you happy
- Keep a journal to track progress, challenges, and gratitude
- Set up a “quiet zone” even if it is just a hammock or small nook where you can pause and breathe
- Stock tea, chocolate, and other morale-boosters alongside your rice and beans
- Create a seasonal rhythm you enjoy, not just survive
Survivalist Chick Tip: This is your land. Design it to be beautiful, comforting, and functional. Function doesn’t have to be ugly.
Final Thoughts from Survivalist Chick
You don’t need permission to start. You don’t need a partner to succeed. What you need is a plan, a steady hand, and the kind of resilience that women have carried for generations. Whether you’re off-grid, suburban, or somewhere in between, your homestead is your power base—and you get to build it your way.
Plant it. Protect it. Thrive on it.
You’ve got this.
—Survivalist Chick

15 Tasty Ways to Use Dehydrated Veggies in Survival Meals

How to Cook Without Power: 10 No-Electricity Meal Hacks That Actually Work

20 Things You Should Have in Your First Aid Preps, But Probably Don’t

How to Prepare for Power Outages: A Guide to Staying Safe When the Lights Go Out

How to Pack Your Vehicle for a Fast Evacuation With Kids: Family-Friendly Systems That Work

Beyond Coffee: 11 Caffeine Sources Every Survivalist Should Prep For

15 Easy Ways to Make Plain Rice Taste Amazing (Prepper & Budget-Friendly Hacks)

18 Canned Goods Everyone Should Stockpile for a Prepper Pantry

10 Survival Skills Every Woman Should Know Before the Grid Goes Down

30+ Foods with a Long Shelf Life Every Survivalist Chick Should Stock Up On

- 15 Tasty Ways to Use Dehydrated Veggies in Survival Meals

- How to Cook Without Power: 10 No-Electricity Meal Hacks That Actually Work

- 20 Things You Should Have in Your First Aid Preps, But Probably Don’t

- How to Prepare for Power Outages: A Guide to Staying Safe When the Lights Go Out

- How to Pack Your Vehicle for a Fast Evacuation With Kids: Family-Friendly Systems That Work

- What to Do If Your Bug-Out Vehicle Breaks Down Mid-Evacuation

- Urban Bug-Out by Vehicle: How to Escape a City Fast Without Drawing Attention

- Survivalist Chick Guide: Hobbies That Make You Apocalypse-Ready

- Beyond Coffee: 11 Caffeine Sources Every Survivalist Should Prep For

- 18 Canned Goods Everyone Should Stockpile for a Prepper Pantry

- Bugging Out with Teenagers: Turning Attitude Into Asset

- Survival Tomatoes: The 12 Best Heirloom Varieties to Grow for Canning and Eating


15 Tasty Ways to Use Dehydrated Veggies in Survival Meals
How to Cook Without Power: 10 No-Electricity Meal Hacks That Actually Work
20 Things You Should Have in Your First Aid Preps, But Probably Don’t
Beyond Coffee: 11 Caffeine Sources Every Survivalist Should Prep For
15 Easy Ways to Make Plain Rice Taste Amazing (Prepper & Budget-Friendly Hacks)
18 Canned Goods Everyone Should Stockpile for a Prepper Pantry
-
 Food Storage1 year ago
Beyond Coffee: 11 Caffeine Sources Every Survivalist Should Prep For
-
 Cooking & Recipes1 year ago
15 Easy Ways to Make Plain Rice Taste Amazing (Prepper & Budget-Friendly Hacks)
-
 Food Storage1 year ago
18 Canned Goods Everyone Should Stockpile for a Prepper Pantry
-
Safety1 year ago
10 Survival Skills Every Woman Should Know Before the Grid Goes Down
-
Food Storage1 year ago
30+ Foods with a Long Shelf Life Every Survivalist Chick Should Stock Up On
-
 Survival4 years ago
How to use a sillcock water key for emergency water access
-
 Survival Prep Item4 years ago
Can you sterilize sewing thread in boiling water?
-
 Cooking & Recipes1 year ago
15 Tasty Ways to Use Dehydrated Veggies in Survival Meals